Eggplant Parmesan Hero

Eggplant is one of my favorite things to eat. Cover it in tomato sauce and cheese and I’m even happier. So it was surprising to me that I had never made eggplant Parmesan before! And now that I have, I am fighting the urge to cook it every night for dinner. It was SO GOOD, and not as hard to make as I was anticipating. The coating and frying of the eggplant takes a little time, but it’s worth it. You can toss the leftovers over pasta or just eat it alone in a bowl. I was going to only eat half of the sandwich for dinner because it was so large, but I ate the entire thing. NO REGRETS!

Ingredients: (serves 4)
1 large eggplant, sliced into 1/4 inch rounds
1 tablespoon salt
3-4 eggs, beaten
All-purpose flour, for dredging
2 cups Italian breadcrumbs
1/2 cup olive oil
12 oz mozzarella, sliced 1/4 inch rounds
1 cup grated Parmesan cheese
1 cup fresh basil, julienned
Fresh rolls

Tomato Sauce: (or use store bought sauce if you like!)
28 oz crushed tomatoes
1/4 teaspoon garlic powder
1/4 teaspoon onion powder
Good pinch red pepper flakes
Salt and pepper, to taste

Place the sliced eggplant in one layer on a baking sheet and sprinkle both sides with some salt. This will remove some of the bitterness. After about 10 minutes, rinse well with water and pat dry.

While the eggplant is doing its thing, make the sauce. Simply place the crushed tomatoes in a saucepan with the garlic powder, onion powder, red pepper flakes, salt and pepper. Using a wooden spoon crush the tomatoes even more and cook for about 5 minutes. Set aside. **I like some tomato pieces in my sauce, but you can use pureed tomatoes if you prefer!

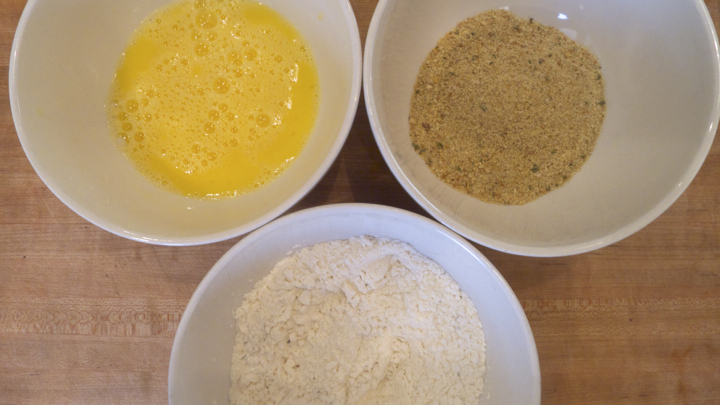
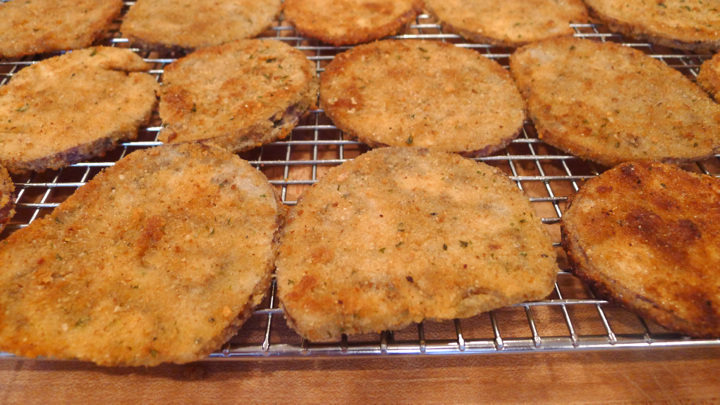
Have your eggs, flour, and breadcrumbs in three separate bowls. Heat 1/8 of an inch of oil in a frying pan until simmering. Have a wire rack ready with some paper towels underneath, or a baking sheet – just something to catch or absorb any drippings from the fried eggplant. First dip the eggplant in the flour, then the egg, then the breadcrumbs, and fry about 5 pieces in the pan at a time. Cook for about 3 minutes on each side, or until golden brown. Make sure the heat isn’t too high or they’ll burn! Place each piece on the wire rack when finished, then repeat with the remaining eggplant.

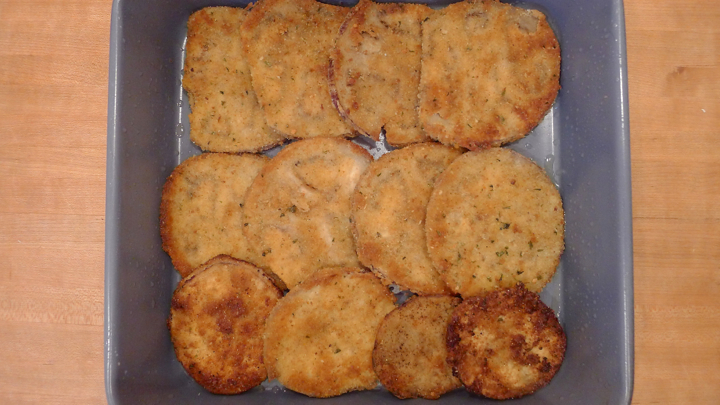
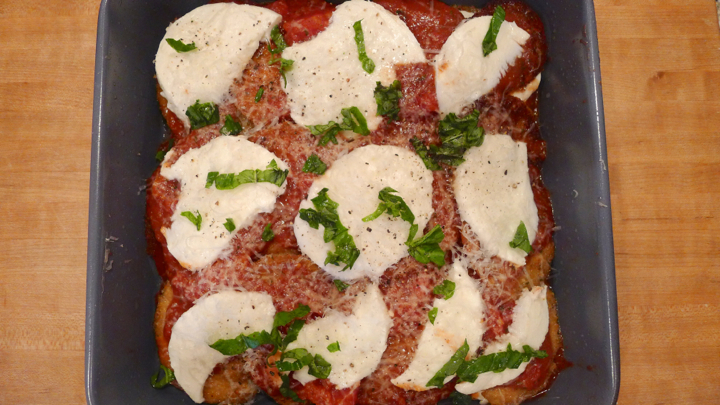
Preheat the oven to 350 degrees. Rub a little olive oil inside a 10-inch baking pan to prevent sticking. Cover the bottom with a single layer of eggplant, overlapping them a bit. Spread about 1/2 cup of the sauce over the eggplant, followed by some of the fresh basil, then top with mozzarella slices and a few tablespoons of the grated Parmesan cheese. Repeat until all eggplant is used. Cover with foil and place in oven for 40 minutes, then remove foil and cook for another 10 minutes or until the cheese is melted and a little golden. Remove from oven and let cool for a few minutes before assembling the sandwich. Slice the rolls and place them in the oven to crisp them a bit, about 3 minutes.

Stuff the rolls with the eggplant and EAT!

Tomato and Corn Galette with Goat Cheese

A saw a gorgeous tomato galette the other day and decided that was what I wanted to make this week when I got a huge heirloom tomato in my CSA bag. I packed it full with corn, shallots, tomatoes, dandelion greens, and goat cheese. My sister gave me the great idea to add some cornmeal to the crust, which I ended up LOVING. One of the many perks of having a sister who went to culinary school!

Ingredients:

Galette Crust:
1 1/4 cups all-purpose flour
1/4 cup corn meal
1/4 teaspoon salt
8 tablespoons cold unsalted butter, chopped into cubes
1/4 cup plain yogurt
2 teaspoons lemon juice
1/4 cup ice water
1 egg, for brushing

Filling:
1 ear of corn, cut off the cob
1 shallot, chopped
1 large garlic clove, minced
1 large heirloom tomato, sliced
1 cup dandelion greens, chopped
2 tablespoons fresh chopped basil
Good pinch red pepper flakes
4 oz goat cheese
Salt and pepper, to taste

Start by making the crust. In a large bowl, mix together the flour, corn meal, and salt. Cut in the butter with a pastry cutter, or use your hands. If using your hands, you simply want to roll the butter chunks between your fingers with the flour until it resembles the texture of small peas. In a separate small bowl, stir together the yogurt, lemon juice, and water. Add this to the flour/butter mixture and mix with your fingers until a dough forms. Shape into a disk, wrap in plastic wrap, and place in the fridge for at least an hour.

When the dough has been in the fridge for about 40 minutes, start making the filling. Add some olive oil to a pan and cook the garlic and shallots for a minute or so, then add the corn and cook for about 4-5. Make sure not to overcook the corn as it will continue to cook in the oven. Next, toss the dandelion greens, basil, red pepper flakes, salt and pepper. Cook for another 5 minutes or so then turn off the heat and set aside to let cool slightly.

Preheat oven to 400 degrees. On a floured surface, roll out the dough to about 12 inch circle and transfer it to a baking sheet lined with parchment paper. It doesn’t need to be perfect, the best thing about a galette is the more rustic it looks the better! Crumble a good amount of goat cheese on the bottom, leaving a 2 inch boarder. Add the corn mixture, followed by the slices of tomato and a little more goat cheese crumbles on top. Fold in the sides of the dough, leaving the center open. Brush edges of dough with the egg wash, then place in the oven for 30-45 minutes or until the crust is golden brown and the tomatoes have cooked a bit. Top with a little fresh cracked pepper and enjoy!

Sweet and Tangy Bread & Butter Pickles

I am a huge fan of anything you can pick out of a jar and eat. My fridge is filled with pickles, olives, marinated mushrooms, stuffed hot peppers… the list goes on. So when I got cucumbers this week in my CSA bag, I figured I may as well just go nuts and add some some bread & butter (sweet) pickles in there too! They’re very easy to make, and if you’re planning to keep them in the fridge to eat over the next few weeks, you get to skip the step of sterilizing the jars. On the other hand, if you’re planning to jar and store these to eat later down the road, you’ll definitely want to bake or boil the jars prior to adding your pickles. Here is a nice little lesson on how to do that from Food52.

Ingredients:
2 medium cucumbers, sliced (not too thin!)
1 tablespoon kosher salt
1 shallot, sliced
1/2 cup white distilled vinegar
1/4 cup apple cider vinegar
1/2 cup sugar
1/4 cup brown sugar
1 teaspoon mustard seeds
1/2 teaspoon celery seeds
1/8 teaspoon turmeric

Place the sliced cucumbers in a bowl and add the salt. Mix well so the salt is evenly distributed. Cover and place in the fridge for one hour. Remove and rinse well with water. Place the cucumbers and shallots in another large shallow bowl. Next, in a medium saucepan the white vinegar, apple cider vinegar, white sugar, brown sugar, mustard seeds, celery seeds, and turmeric. Cook and stir over medium heat until the sugars have dissolved. Pour the liquid over the cucumber and onions and let sit for 1 hour until room temp. Transfer to your jar(s) and plop right in the fridge. Your pickles will be good to go within 24 hours!