Vegetable Summer Rolls

Summer rolls are one of my favorite things, I love everything about them- the vegetables, the thin noodles, the texture of the rice paper…and to be honest I could probably drink a glass of the dipping sauce that is usually served with them. I get an intense craving for them every once and a while and today was one of those days. I also happen to have the dipping sauce from Trader Joe’s that I love, so it was good timing to make them. Summer rolls are pretty easy when it comes to the ingredients because you can really use a lot of different vegetables, I usually try to get a few different colors so they look pretty when wrapped up together. I also love tossing in fresh basil or mint!

Ingredients:
1 seedless cucumber, cut into thin matchsticks
1 carrot, peeled and cut into thin matchsticks
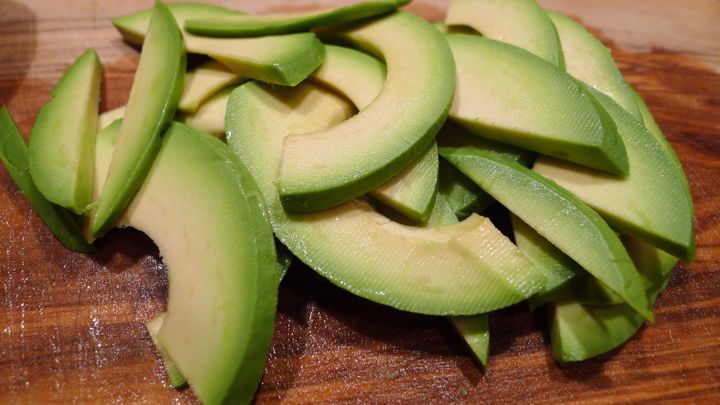
1 ripe avocado, cut into thin slices
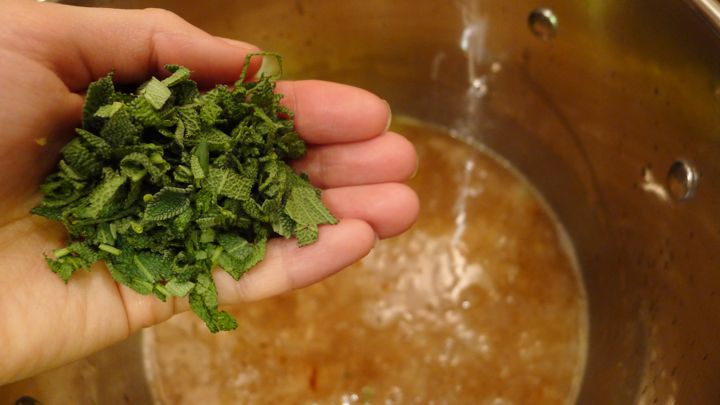
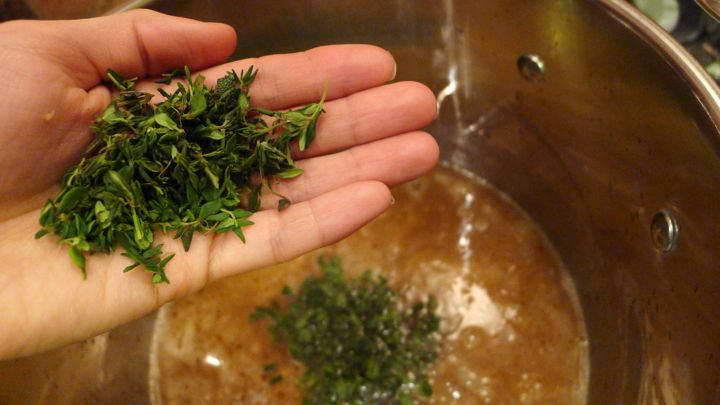
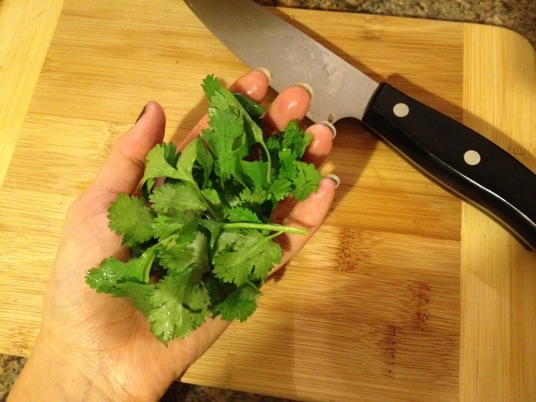
Fresh basil or mint leaves
Package of spring roll skin (the larger sized ones)
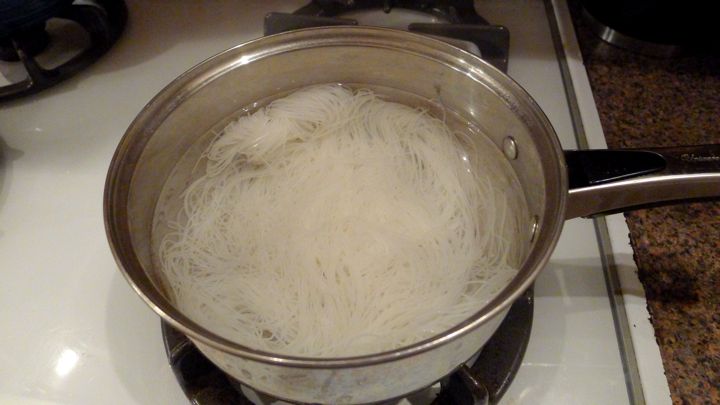
1 box rice noodles

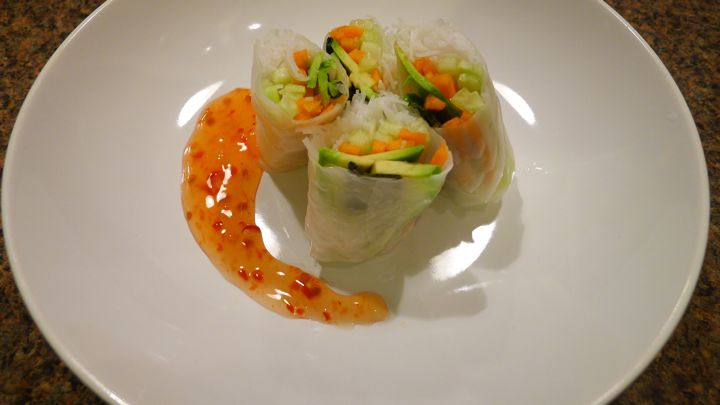
For the sauce: I LOVE Trader Joe’s sweet chili dipping sauce, so this is what I used. It is delicious. But you can also make you own version at home if you’d like.

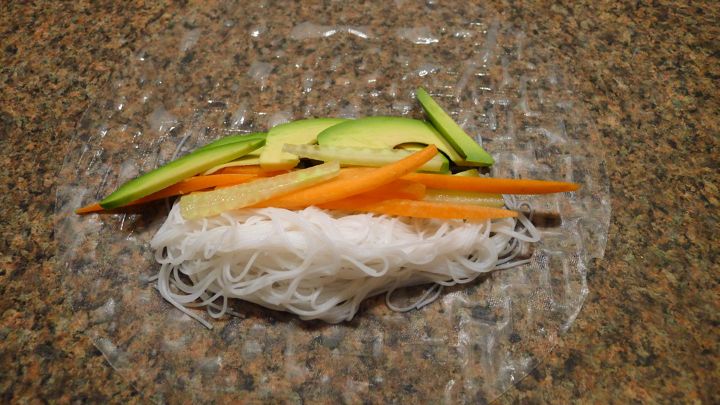
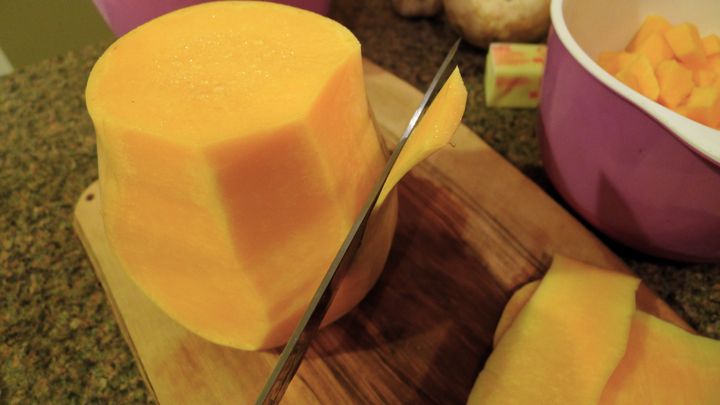
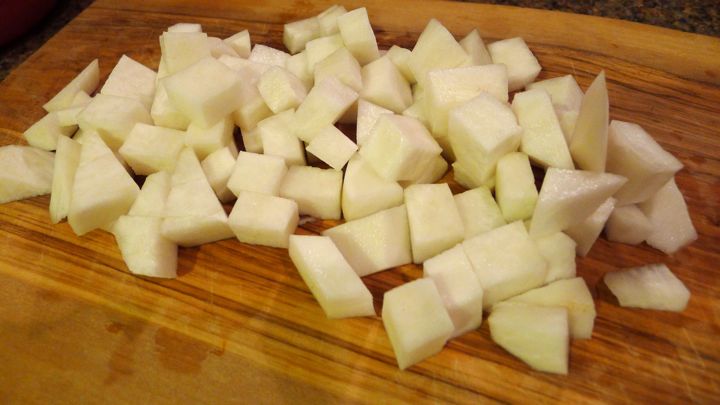
Start by chopping all of your vegetables into thin pieces. Next, get a pot of water boiling then remove it from the heat. Add your rice noodles and let sit in the water for about 8-10 minutes. Drain and run under cold water until the noodles are cold. Set aside. I only usually cook 1/4 of the package at a time because it makes a lot of noodles! 
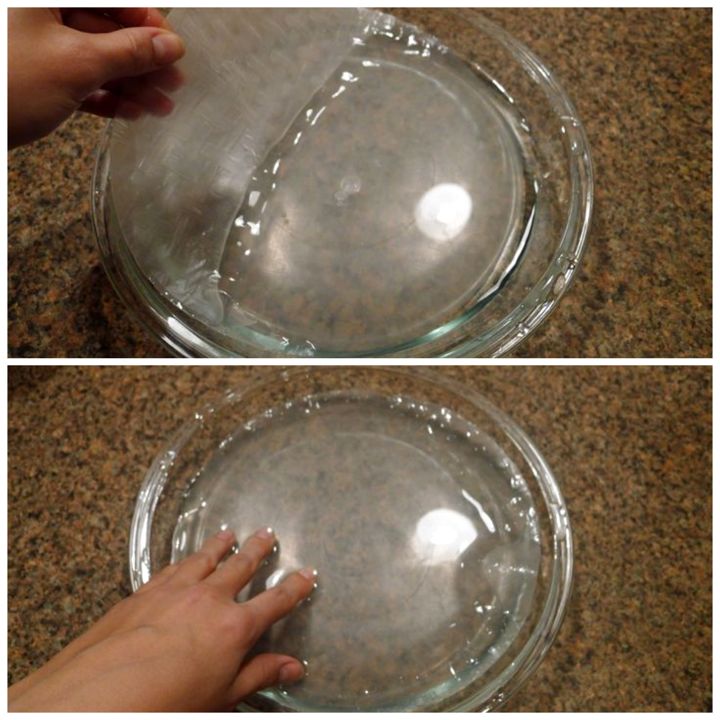
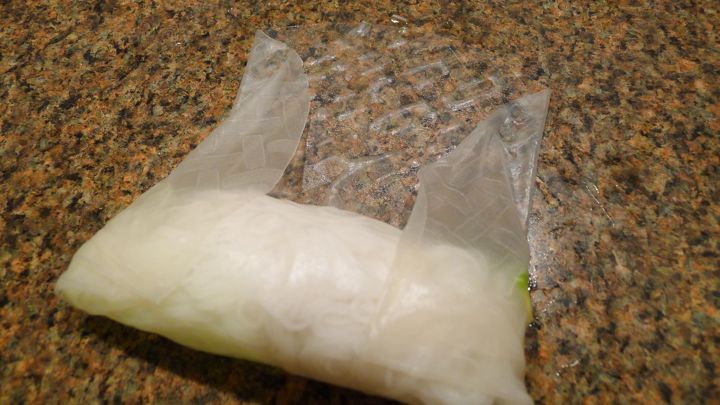
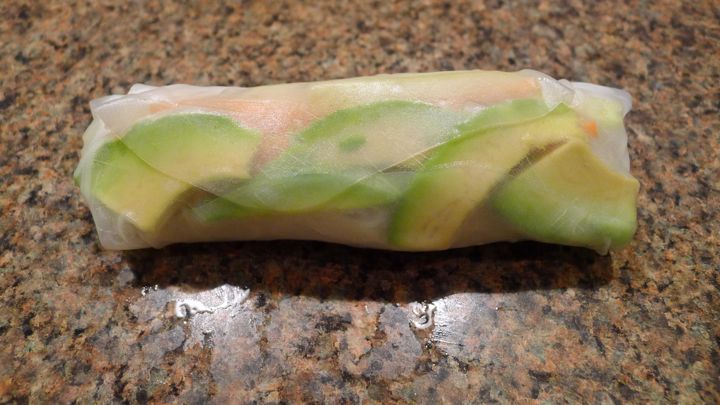
Next, fill a shallow dish with lukewarm water (I always use a pie dish) and add one of your spring roll skins making sure to get it completely submerged underwater for about 15-20 seconds. You want it to feel like it is about to get “noodley” but still has some firmness to it. Reason being, once you remove it from the water, you’ll see that it still continues to loosen up a bit. Place the sheet on a flat clean surface. Add your noodles along with you other ingredients. Place them a little under the center line though so when you roll you’re able to get it tight. Try to work fast before the wrapping starts to get stuck to the surface (if it does just keep dipping your fingers in water as you’re rolling it, this helps a lot). Start by folding up the bottom and tucking it under the ingredients, next fold in the sides, then roll it up! It’s just like rolling a burrito really. Cut in a diagonal in half and serve with dipping sauce!
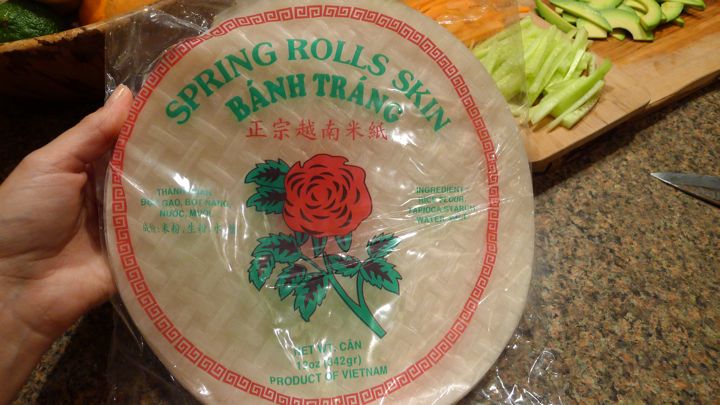
Butternut Squash Soup With Turnips and Apples

Butternut squash soup. It’s so great in the winter, warm and filling. Exactly what I wanted after a week of freezing cold weather here in the city. I also was excited to try out my new immersion blender that I got for Christmas, so this was perfect. I had a turnip and some apples on hand, so I added those for some extra flavor. This soup was delicious! And incredibly fast and easy for a homemade soup…

Ingredients:
(adapted from Smitten Kitchen- serves about 8)
1 large butternut squash, peeled and cubed
1 large turnip, peeled and cubed
2 apples, peeled and cubed
1 large onion, chopped
2 large garlic cloves, minced
1 32-ounce box of vegetable broth (or chicken broth)
1/4 cup unsalted butter (1/2 a stick)
1 1/4 teaspoons fresh minced thyme
1 1/4 teaspoons fresh minced sage
1 1/2 teaspoons cumin
1/2 teaspoon ground ginger
1/8 cup cream

Croutons:
2 tablespoons butter
1/4 inch thick baguette bread slices (however many you’d like!)
grated Gruyere cheese
fresh minced thyme
fresh minced sage

Melt 1/4 butter in a large soup pot, add the garlic and cook for a minute followed by the onion. Cook for about 10 minutes until translucent. Add the broth, squash, turnips, apples, and fresh herbs. Bring to a boil. Reduce heat and let everything simmer for about 20 minutes, or until you are able to pierce the squash with a knife.

At this point you can either blend it in batches in the blender until smooth, then return it to the pot, or you can use an immersion blender right in the pot (just turn of the heat first). I went for the immersion blender! Once smooth, stir in the ginger, cumin, and cream.

Now for the croutons! Get your broiler going. Butter one side of the bread slices and place them on a baking sheet. Place them in the oven under the broiler until golden. Flip them over and add the cheese and fresh herbs, place back under the broiler until the cheese is melted and the edges get a little crispy. By flipping it, you are able to get both sides toasty and crunchy. Ladle some soup into the bowls, and top with the crouton. Enjoy!

Kale Caesar Salad

Image

I love a good caesar salad, and I love kale. So I was pretty excited to give this recipe from Real Simple magazine a shot. Couldn’t have been easier to make! Caesar dressing isn’t the healthiest thing out there, but kale is so incredible good for you that you don’t feel as bad when you’re scooping out mayo and mixing it with cheese. I put some onion in seeing the recipe called for it, but am not a huge raw onion fan. In the future I might leave this out or substitute it for something else like shredded carrots.

Ingredients:
1/4 cup light mayonnaise
1/4 cup grated Parmesan cheese
2 tablespoons lemon juice
2 tablespoons olive oil
1 teaspoon Dijon mustard
1 teaspoon Worcestershire sauce
Medium bunch of kale, stemmed and leaves chopped
2 hard boiled eggs, chopped
1/4 small red onion, thinly sliced
Salt and pepper

Start by boiling your eggs, as they will take about 10 minutes to cook. In a large bowl, whisk together the mayonnaise, Parmesan cheese, lemon juice, olive oil, Djion mustard, Worcestershire sauce, and salt and pepper to taste. Chop your kale, egg, and onion. Toss together and combine well. That’s it!

1

35

Roasted Vegetables with Lentils

20130119-143356.jpg

As I’m sure you have noticed, a lot of my recipes are the result of whatever items I am surprised with in my CSA bag each week. This week I got a bunch of nice roasting vegetables as well as lentils, so when I came across this recipe on Whole Living, it was meant to be! And very delicious. The great thing about roasting a ton of vegetables together is that you can use them in different ways for your other meals over the next few days. I ended up making parmesan polenta topped with my leftover vegetables and a poached egg the next night. Can’t go wrong!

Ingredients:
1 red onion (or two small), cut into quarters
1 small shallot, halved
3 carrots and/or parsnips, halved lengthwise
1 acorn squash, halved, seeds removed and cut into 1/2 inch slices
Brussel sprouts (about 10-15)
2 celery stalks, thinly sliced
1/2 cup dried green lentils, rinsed
4 tsp apple cider vinegar
1 tsp Dijon mustard
5 tablespoons extra virgin olive oil
Course salt and pepper

Heat oven to 425 degrees. Cut up the vegetables and place on a baking sheet (everything but the celery) and drizzle with 2 tablespoons olive oil. Bake in oven for 30 minutes, turning once half way through.

20130119-143527.jpg

20130119-143553.jpg

20130119-143614.jpg

20130119-143637.jpg

20130119-143656.jpg Next, rinse the lentils well then add them along with the shallot to a pot of water, covering everything by two inches or so. Bring to a boil then simmer, covered, until the lentils become tender, about 20 minutes. In the meantime, mix your vinegar and mustard in a small bowl. Slowly whisk in the remaining 3 tablespoons of olive oil. When your lentils are ready, drain and toss the shallots. In a medium bowl, mix together the lentils, celery, and dressing. Salt and pepper to taste.

20130119-144314.jpg

20130119-144338.jpg

20130119-144408.jpg

20130119-144708.jpg

20130119-144739.jpg

20130119-144800.jpg

20130119-144823.jpg Remove roasted vegetables from the oven. To plate, scoop some of the lentil mixture and top with the vegetables…enjoy!

20130119-145111.jpg

20130119-150157.jpg

20130119-150227.jpg

20130119-152030.jpg

20130119-152058.jpg

Mom’s Raspberry Turnovers

20130117-204047.jpg

Another special recipe my mom agreed to share while I was home! She makes these raspberry turnovers every Christmas and I LOVE them. And now I have the recipe. So I shall make them for breakfast, lunch, and dinner until the end of time.

Ingredients:
3 cups flour
1 tsp baking powder
1/2 tsp salt
3/4 cup butter, room temperature
1 1/2 cups sugar
2 eggs
1 tsp vanilla extract
Raspberry preserves/jam

She makes the dough the day before and lets it sit in the fridge overnight to harden. I wasn’t there when she made the dough, so I don’t have photos for that part, but it’s pretty simple: mix the flour, baking powder, and salt in a bowl. Set aside. In a separate bowl with an electric mixer, beat the butter, sugar, eggs, and vanilla, until light and fluffy. Mix in the flour a little bit at a time until fully incorporated. Remove from the bowl and shape into a ball. Wrap in Saran wrap/waxed paper and place in the fridge overnight.

When you are ready to make the turnovers, pre-heat the oven to 375 degrees and remove the dough from the fridge, dividing it into four parts with a knife. Work with one part at a time and throw the rest in the fridge to keep cold. Flour your surface, dough, and rolling pin then roll out your dough into a big rectangle shape, leaving it 1/8 of an inch thick. If it’s too thin then it is more likely to tear. From here, use a sharp knife to cut out little 4×3 shapes.20130117-204836.jpg20130117-204908.jpg20130117-204947.jpg

Plop a scoop of jam in the center and fold in half. Use a fork to seal the edges. Flouring the fork here and there helps it from sticking. Poke a few little holes in each turnover (to keep them from exploding when in the oven) and place them on a baking sheet lined with parchment paper. Work fast otherwise the dough will warm up and begin to stick to things. Repeat with the rest of the dough.

20130117-210300.jpg20130117-210326.jpg20130117-210354.jpg20130117-210445.jpg20130117-210509.jpg

Bake 10-12 minutes or until golden brown. Make sure they cool enough before you eat them. Many times in the past I have been very impatient and burned a layer of skin off my tongue!

20130117-212532.jpg

20130117-212558.jpg

20130117-212632.jpg

20130117-212700.jpg

Beef Stew and Vegetables

20130110-224814.jpg

I love beef stew! How can you not? Great comfort food if you ask me. My grandmother (the famous Bumma) puts dumplings in her recipe and I absolutely love it. I believe she makes them with Bisquick actually, which is a neat trick! I had never made beef stew myself, and when I came down with a cold this week, I wanted something warm and hearty to make me feel better. It was also great timing because I happen to receive most of the vegetables I needed right in my CSA this week! I’d also like to note that I bought my meat at Dickson’s Farmstand in Chelsea Market, which is a really great place for local (and humanely raised) meat products. Always important to believe in the food you’re eating!

Ingredients: (adapted from the Pioneer Woman)
2 lbs stew meat, I bought chuck
4 whole carrots, roughly sliced
4 whole potatoes, quartered
1 whole medium onion (or two small in my case), diced
3 garlic cloves, minced
3 tablespoons olive oil
1 tablespoon butter
1 tablespoon Worcestershire sauce
1 12oz can beer
4 cups beef stock (or you can use bouillon cubes w/water)
2 tablespoons tomato pasta
1/2 teaspoon paprika
1/2 teaspoon kosher salt
Freshly ground pepper
1-1/2 teaspoon sugar
Parsley for topping (optional)

Start by heating your butter and oil in a large pot over medium-high heat. I got to use my new Dutch oven for the first time which was exciting (thanks Santa!). Brown the meat in two batches and place on a plate off to the side. Make sure not to overcook the meat at this point, otherwise it will get chewy later.

20130110-224918.jpg20130110-230521.jpg20130110-230559.jpg20130110-230623.jpg20130110-230821.jpg

Dice your onion and mince the garlic. Add the onion to the pot first and cook about two minutes until it starts to become translucent, then throw in the garlic and cook for an additional minute or so. Next, add the beef broth followed by the beer, which will make it get a little foamy on top! Cut the meat into nice bite size chunks and add that as well.

20130110-232355.jpg20130110-232533.jpg20130110-232558.jpg20130110-232630.jpg20130110-232818.jpg20130110-233205.jpg

Next add the Worcestershire sauce, tomato paste, salt, pepper, paprika and sugar. Cover and cook for 90mins-2hrs.

20130110-234310.jpg20130110-234339.jpg

20130110-234556.jpg

20130110-234627.jpg

20130110-234701.jpg

20130110-234725.jpg

20130110-234852.jpg

20130110-235323.jpg

When there was about 15mins left, I washed and roughly chopped my carrots and potatoes. It was nice because I actually had a few orange carrots, some yellow ones, and some parsnips that I used. Plus my potatoes were purple! Quite the tie-dye stew I was making. When the 90 mins were up, I was expecting my stew to have thickened a lot more than it did, but I continued with adding my carrots and potatoes anyway and let it cook for another 30 minutes until the vegetables softened. What I ended up doing to thicken it a tiny bit was mix 2 tablespoons of flour with half a cup of cold water, then adding that to the stew which helped a little bit, especially after it sat a little. Came out really great, and I’ve been eating it all week!

20130111-001602.jpg

20130111-001626.jpg

20130111-001734.jpg

20130111-001810.jpg

Mom’s Coconut Chocolate Roll

20130102-005648.jpg

My mom makes some really great desserts around the holidays, and this is one of them! When I was home for Christmas she agreed to share her special recipe and let me photograph her making it. What a lady, huh? Hope this makes you as warm and happy as it makes me!

Ingredients:
1/4 cup butter
1 cup chopped nuts (we used walnuts)
1 1/3 cup shredded coconut
1 (15oz) can sweetened condensed milk
3 eggs
1 cup sugar
2/3 cup flour
1/3 cup cocoa powder
1/4 tsp baking soda
1/3 cup water
1 tsp vanilla extract
1/2 cup powdered sugar

Line a 15x10in baking sheet with parchment paper. Make sure the the paper comes up over the edges, this will be helpful later. Melt the butter and pour it over the parchment and spread it around. Sprinkle evenly with shredded coconut, followed by the chopped nuts. Next, drizzle the sweetened condensed milk over the entire pan. Place aside.

20130102-001854.jpg

20130102-001953.jpg

20130102-002107.jpg

20130102-002132.jpg

20130102-002201.jpg

In a mixing bowl, beat 3 eggs at high speed for 2 minutes. Gradually add the 1 cup of sugar, followed by the flour, cocoa powder, baking soda, water, and vanilla extract (I forgot a few photos here, my mom moves fast!). Blend well. Pour this over the coconut/nut mixture. Bake at 375 degrees for 20 minutes or until the cake springs back then touched in the center.

20130102-002941.jpg

20130102-003002.jpg

20130102-003030.jpg

20130102-003106.jpg

20130102-003151.jpg

20130102-003347.jpg

20130102-003224.jpg

20130102-003422.jpg

After removing the cake from the oven, sprinkle with the powdered sugar. It helps to fold back the parchment a little to unstick the cake from the edges, this way when you roll it, it’s already a little loose. Place a clean kitchen towel over the cake, followed by a flat cookie sheet. Hold the edges tight and flip over onto a flat surface! Remove the top baking sheet and parchment paper.

20130102-004116.jpg

20130102-004148.jpg

20130102-004215.jpg

20130102-004638.jpg

To roll the cake, start at one end using the towel to help guide it. You’ll notice as you pull the towel up and over, the cake will continue to roll up. Great trick! Once all rolled up, remove the towel and wrap it up in plastic wrap, as well as foil. Place in fridge over night so that it firms up.

20130102-005211.jpg

20130102-005239.jpg

20130102-005307.jpg

20130102-005409.jpg

20130102-005432.jpg

20130102-005613.jpg

Homemade Vanilla Extract

This couldn’t be easier to do, and is a great homemade gift to give out to friends and family during the holidays! All you need are good vanilla beans, vodka, and a little patience. They will last forever, just like the vanilla extract you’d buy at the store. Definitely have them sit for about 6 months before using it though so that it has had time to sit.

Ingredients:
48 good vanilla beans (8 beans per bottle)
1 liter bottle of vodka

I bought my madagascar vanilla beans on http://www.beanilla.com, where they have a nice variety of vanilla, as well as bottles to purchase which is convenient. I bought my bottles at Fishs Eddy here in the city though, one of my favorite stores!

Start by slicing down the center of each vanilla bean with the tip of a sharp knife, not so hard that you cut through to the other side though. You are opening up the beans so that the vanilla is exposed. It smells SO good! Fill the bottles with 8 beans each. You will need at least 8 beans per bottle to get the full strong flavor for the extract. Lastly, fill each bottle with vodka covering the beans to the top and seal the tops. When buying the vodka, you don’t need anything super fancy. I went for something on the cheaper side, but not so cheap that it reminded me of my college days. Shake each bottle gently to release some of the vanilla from the beans. Place in a cool dry space and shake once a day for a week or so, then you can just give them a shake every couple weeks following that. You’ll notice that they get darker and darker over time. It will will be usable within 4 months, but I recommend letting it sit a little longer. The longer the better!

20121224-171616.jpg

20121224-171652.jpg

20121224-171714.jpg

20121224-171755.jpg

20121224-171830.jpg

20121224-171907.jpg

20121224-171931.jpg

20121224-172017.jpg

After one week…

20121224-172112.jpg

This is after about 4 months…

20121224-172513.jpg

Roasted Zucchini, Black Bean + Goat Cheese Enchiladas

20121223-195614.jpg

I’ve never had enchiladas like these before, and normally wouldn’t think to fill them with vegetables and goat cheese…but it was really delicious! I made the enchilada sauce myself too, which is very easy to do. The last time I made these I just used Trader Joes enchilada sauce, which is really good and has quite a kick to it!

Ingredients: (adapted from Sprouted Kitchen)
2 zucchinis, diced
1 summer squash, diced
3 tablespoons olive oil
1/2 small red onion, thinly sliced
1 15oz can black beans, rinsed
5 oz soft goat cheese
8-10 corn tortillas
2 ripe avocados
Fresh cilantro
Lime

Enchilada Sauce:
25oz canned tomatoes
1 sweet onion, sliced
1 clove garlic
5 jalapeño slices (or as much as you want!)
3/4 tsp chili powder
3/4 tsp cumin
1/2 tsp oregano
1/4 tsp thyme
2 tbsp fresh cilantro
2 tbsp white wine vinegar
3/4 cup water
1/4 cup sour cream
S&P

To get started, preheat your oven to 425 degrees. Dice up your zucchini and squash and toss in olive oil and S&P. Spread onto a rimmed baking sheet and cook for 20 minutes.

20121223-214627.jpg

20121223-214801.jpg

20121223-214825.jpg

To make the enchilada sauce, simply place all the ingredients into the blender and blend until smooth. You’ll then want to heat it on the stove top before eventually pouring it into the baking dish.

20121223-211443.jpg

20121223-211524.jpg

20121223-211641.jpg

20121223-211738.jpg

20121223-211759.jpg

20121223-211820.jpg

20121223-211847.jpg

20121223-211944.jpg

20121223-212014.jpg

20121223-212039.jpg

20121223-212110.jpg

20121223-212133.jpg

20121223-212227.jpg

20121223-212253.jpg

20121223-212446.jpg

Next, add your zucchini/squash to a bowl with the rinsed black beans and half of the goat cheese. Mix together. Unfortunately, I completely forgot to photograph this process, but I’m sure you can close your eyes and just image me doing it! I like to warm my tortillas over the gas burner to heat them up and brown them a bit. Lay the tortilla flat and add your filling. Fold in the sides and roll up from the bottom. Place each enchilada in the baking dish (which has about half the warm sauce on the bottom already). Once the dish is filled, brush the tops with olive oil then cover with the rest of the sauce and goat cheese. Cook on 375 for 20 minutes. Serve with a lime wedge, avocado and fresh cilantro!

20121223-215614.jpg

20121223-215646.jpg

20121223-215830.jpg

20121223-215854.jpg

20121223-215922.jpg

20121223-215959.jpg

Vegetarian Borscht

20121216-185929.jpg

I absolutely love Veselka’s borscht in the East Village. If you haven’t had it, then stop reading this and just leave. Go there immediately. You can find their recipe online actually, but it takes a couple hours to make. I was looking for something a little quicker and landed on this vegetarian version. It came out really nice, and definitely gets better after a day or two. I want to take the time to make their version one day. If I could make that at home, I’d never have to leave the house.

Ingredients:
4 large beets, peeled and cut into matchsticks
3/4 pound of cabbage, shredded
1 onion, sliced
2 large carrots (or 1 carrots and a few parsnips, like I did)
5 cups vegetable stock
Juice of 1 lemon
2 tablespoons olive oil
1 garlic clove
2 tablespoons cider vinegar
S&P

Start by cutting up the carrots, parsnips, and beets into little matchsticks. Next slice your onions, and shred the cabbage. Heat 2 tablespoons olive oil in a big soup pot and add the onions, garlic, beets, carrots and parsnips. Cook for about 10 minutes, until everything softens a bit and the beet color starts to take over.

20121216-192422.jpg

20121216-192443.jpg

20121216-192458.jpg

20121216-192516.jpg

20121216-192606.jpg

20121216-192655.jpg

20121216-192711.jpgWhile your veggies are cooking, add your vegetable stock to a separate pot and bring to a boil. When the vegetables are ready, add the cabbage as well as the hot stock. Mix well and S&P to taste. Let cook for 30 minutes. Add the lemon juice and cider vinegar. Spoon into bowls and add a dollop of sour cream!

20121216-192959.jpg

20121216-193013.jpg

20121216-193027.jpg

20121216-195037.jpg

20121216-195051.jpg

20121216-195107.jpg

20121216-195747.jpg