Thai Coconut Lemongrass Soup

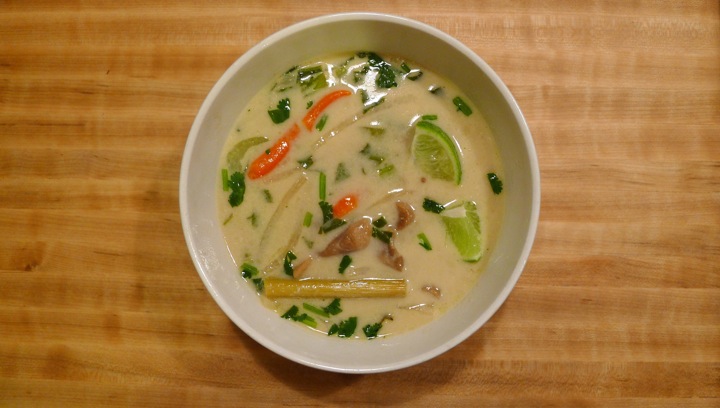
I am a huge fan of Thai food and frequently visit Chelsea Thai (in Chelsea Market) for their Tom Ka Gai soup. It’s sweet, sour, and spicy all at the same time.  I’ve always wanted to try and make it myself, so today I went for it! I made my version without chicken and just stuck to veggies. I added some bok choy that I got in my CSA this week which I thought was a nice addition. I am lucky to have had my best friend bring me back spices from her trip to Thailand recently, so a few of the “what the heck is that” ingredients were already on hand. If you end up making this soup, Whole Foods has a great selection of spices etc and should have what you need. The soup came out better than I could have hoped for- it tasted just like Chelsea Thai!

Ingredients: (adapted from Atelier Christine)
Serves 2

1 cup coconut milk
1 cup chicken stock
1 cup water
2-3 lemongrass stalks, pressed down with a knife (like you do to garlic) and cut into 3 inch pieces
1 tablespoon coriander seeds
1 teaspoon Thai galangal powder
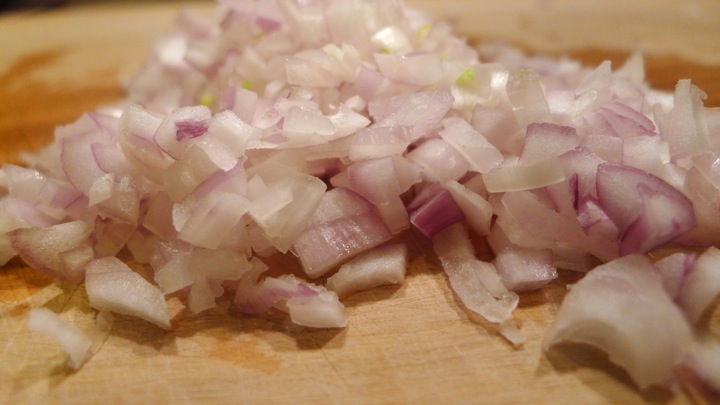
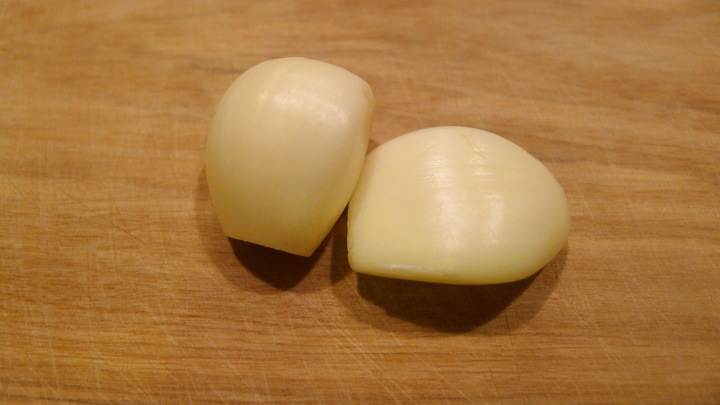
2 small shallots, one cut in half & the other minced
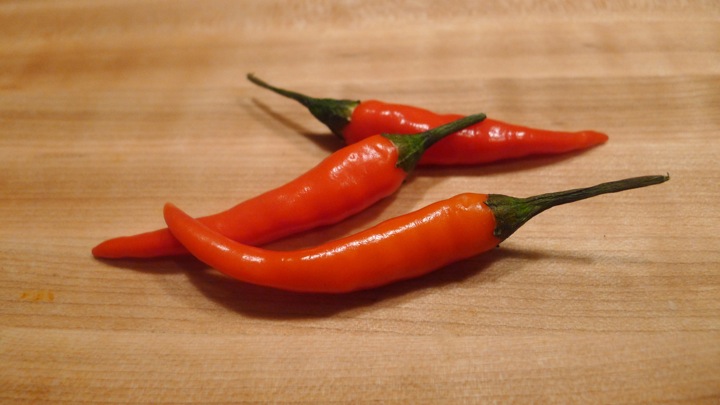
1-2 small Thai red chilies, depending on preferred heat
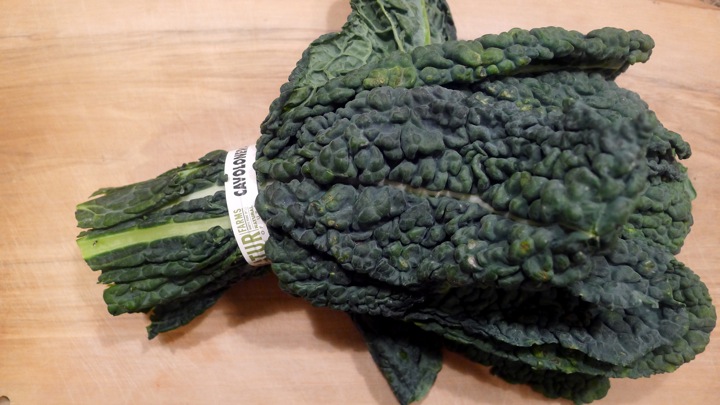
2 baby bok choy bunches, ends trimmed and roughly chopped
1/2 can of straw mushrooms
1/2 can of bamboo shoots
1/8 cup coconut cream
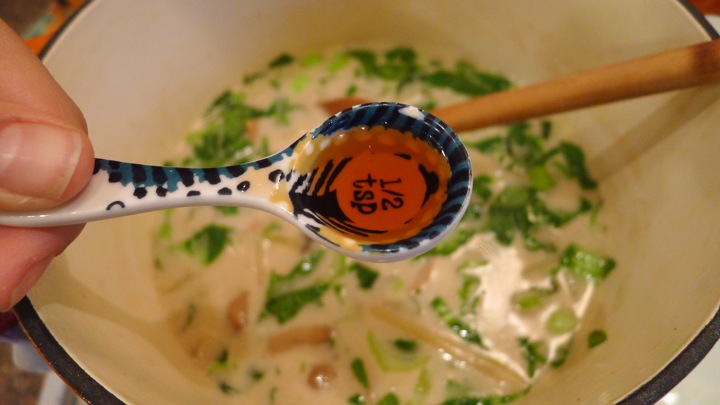
1 teaspoon fish sauce
2 small limes, juiced (saving half a lime for serving)
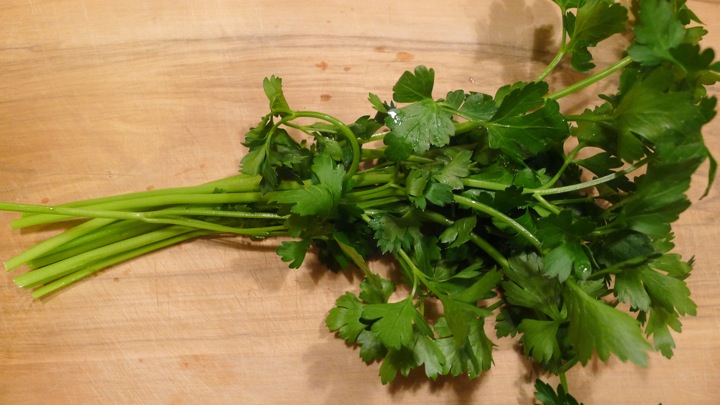
1/4 cup fresh cilantro, roughly chopped (and a few sprigs left whole)

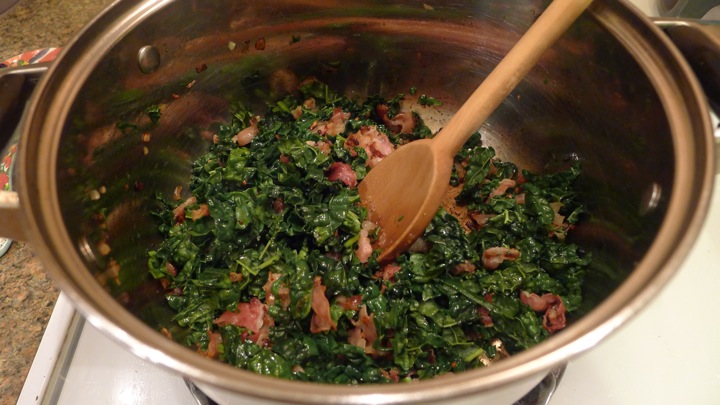
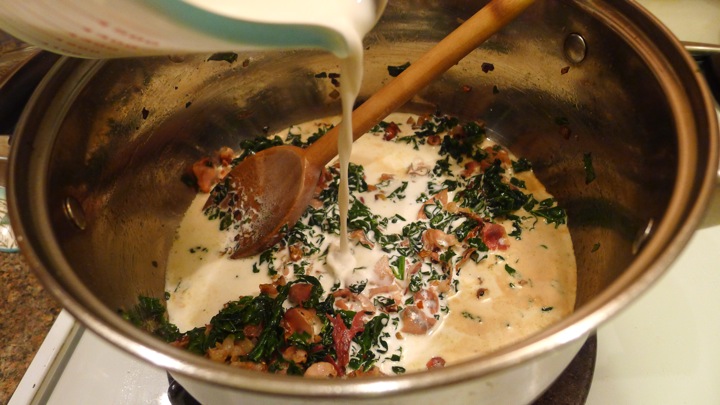
In a heavy bottomed pot, add the first 8 ingredients and bring to a simmer along with a few cilantro sprigs as well. Cover and cook on low for 30 minutes, stirring occasionally. Strain through a fine mesh sieve, adding all the liquid back to the pot along with the lemongrass and red chilies. Discard the rest. Next add the remainder of the ingredients- bok choy, mushrooms, bamboo shoots, coconut cream, fish sauce, lime juice, and cilantro. Cook for another 10 minutes. Serve with a small wedge of lime for an extra squeeze!

Sweet Potato, Chorizo, & Caramelized Onion Empanadas

I first have to start this post with the introduction of my NEW cutting board that my fathers amazing girlfriend (whom we call “prinnie”) personally made me. I was completely blown away when it came in the mail, and couldn’t believe she made it by hand. I had been complaining that I couldn’t find the right cutting board anywhere, so her solution was to just make one! Pretty inspiring- you really can learn to make anything if you put a little time and love into it. THANK YOU Prinnie!! She is now selling them on her new website for others to enjoy as well!

Ingredients:
1 box pie dough (or homemade if you have time!)
1 large sweet potato, peeled and cut into large chunks
1 tablespoon melted butter
1/4 teaspoon ground cumin
1/4 teaspoon ground cinnamon
1 small white onion, thinly sliced
1 garlic clove, minced
3/4 cup manchego cheese, shredded
Smoked paprika for topping
Salt and pepper, to taste
1 egg, beaten (for egg wash)

Start by preheating the oven to 400 degrees.

Toss the sweet potato in some olive oil and roast on a baking sheet lined with parchment paper for 30 minutes or until fully cooked. Once it’s done, mash it in a bowl with the butter, cumin, cinnamon, and salt and pepper. While the potato is cooking, get the rest of the fillings ready to go. Add a tiny bit of olive oil to a pan and brown the chorizo, then set it aside in a bowl with a paper towel to drain the fat. In the same pan, cook the onions in the leftover sausage drippings until golden brown and caramelized. Toss in the minced garlic and cook for an additional minute or two.

On a floured surface, roll the dough out so it is 1/4 of an inch thick, then cut 5 to 6-inch round circles (I simply used a bowl to make my circles) Place a tablespoon of sweet potatoes on one half of the circles, then add a scoop of chorizo, followed by some caramelized onions, and pinch of cheese. Don’t fill them too much that they are hard to close! Brush edges with a little egg wash and fold the dough over, pressing the edges down with a fork. Cut a little sliver into the top of each pie, this will help them vent while cooking. Brush the tops of the empanadas with some egg wash and sprinkle with a small pinch of smoked paprika. Bake until crust is golden, about 12-15 minutes. Remove from oven and let cool slightly before serving. Enjoy!

Kale Pesto Pizza With Roasted Beets and Goat Cheese

I make pizza at home a lot, but I have never tried adding beets before! It wasn’t what I expected, and I loved it. I think it especially tasted great with the kale pesto and goat cheese. I had also never used whole wheat dough before, and was actually a pretty big fan! It added a nice flavor that complimented the rest of the ingredients. Overall a pretty delicious (and healthier than usual) pizza!

Ingredients- (Adapted from A Passionate Plate)

Kale Pesto:
1 small bunch of kale
3 garlic cloves, roasted
6 tablespoons olive oil
1/2 cup grated Parmesan
1/3 cup pine nuts
1 tablespoon lemon juice
Salt and pepper, to taste

Other:
Whole wheat pizza dough
4 small beets, roasted and sliced
2 small Yukon potatoes, sliced
Goat cheese
Small handful pine nuts, toasted
Olive oil, for drizzle

Preheat oven to 400 degrees. Slice beets in half and place in an aluminum foil “pouch” with the garlic and drizzle with some olive oil. Cook for 20 minutes in the oven or until the beets can easily be pierced with a knife. I used small candied beets so they cooked faster than say a regular size beet which could take 40 minutes or so. While those cook, thinly slice the potato and simultaneously cook those in the oven for 10 minutes, or until slightly browned. In the meantime, de-stem the kale and blanch it for 30 seconds in boiling water, then transfer to a bowl of ice water to stop the cooking. Squeeze out the excess water and place in a food processor with the olive oil, Parmesan cheese, pine nuts, lemon juice, and roasted garlic from the oven. Blend until you have a pesto consistency, then salt and pepper to taste.

Roll out the pizza dough on a floured surface. Spread some of the kale pesto, then top with the roasted potatoes, beets, and goat cheese. Bake in oven for 20 minutes or until the crust is slightly browned. Top with some fresh pepper and toasted pine nuts. I also drizzled a little olive oil to finish it off, but this is optional. Enjoy!

Vanilla Seared Scallops With Swiss Chard & Grapefruit


I’ve never cooked scallops before, but my sister Devon was telling me about a recipe she came up with the other day where she seared some scallops in brown butter and vanilla, so I really wanted to try it! They came out great! The sweet scallops were nice with the bitterness of the grapefruit and Swiss chard. Overall a successful first scallop attempt- so thanks Dev! If you’re not a fan of bitter greens, bok choy or spinach would be a nice alternative.

Ingredients:
4 jumbo scallops
1 1/2 tablespoons butter
1/4 teaspoon vanilla extract
2 tablespoons olive oil
1/2 shallot, finely chopped
Thin slice of fresh ginger, minced
1 small bunch of Swiss chard, washed and lightly chopped
1 small grapefruit, segmented and cut into smaller chunks
1 tablespoon grapefruit juice
Salt and pepper, to taste

Start by removing and discarding any muscle tabs still attached to the scallops (if they have any) then pat dry with a paper towel and season both sides with salt and pepper. Add the butter and vanilla to a medium frying pan over high heat. Once the liquid is hot (but not smoking) add the scallops. Sear them for about 2-3 minutes on one, then flip over and sear on the other side for another 2-3 minutes. You want them to get nicely caramelized on each side but without overcooking. Place on a plate and cover with some foil to keep warm while you quickly cook the greens.

In another medium frying pan, heat two tablespoons of olive oil and sauté the shallot for a few minutes. Add the Swiss chard and cook down for a few minutes until wilted. Next add the grapefruit juice and chunks, followed by a little pepper. Plate some of the Swiss chard and grapefruit, and top with the seared scallops and any juice leftover from the scallop pan. Enjoy!

Creamy Kale & Lemon Fettuccine with Pancetta

I ordered some Tuscan Kale fettuccine from my CSA this week and it was delicious! Made locally in NY too, which is great. I’ve been craving a creamy pasta dish lately, so that is exactly what I made. I added fresh chopped kale to compliment the kale fettuccine. I also added a lot of lemon, mainly because I love lemon and kale together, but also because eating citrus with your leafy greens helps your body absorb more of the nutrients it contains. Double win. All in all a really nice Tuesday dinner!

Ingredients:
Tuscan Kale fettuccine (though this would work with any pasta!)
1/2 a small bunch kale, stemmed and chopped
1 small shallot, finely chopped
2 garlic cloves, minced
3 ounces pancetta, roughly chopped
1/2 cups half & half
1/3 cup freshly grated Parmesan
Juice and zest of 1/2 lemon
1/3 cup pine nuts, toasted
Fresh parsley, for topping
1/2 teaspoon red pepper flakes (optional)
Salt and pepper, to taste

Start by chopping all of the necessary ingredients so they are ready to go as needed. I find it helps to get all the labor done before you start cooking. Also get a large pot of salted water boiling for the pasta. In a saucepan, drizzle some olive oil and cook the shallot for a few minutes. Next add the garlic, cooking for another minute or so. Add the panetta and cook until browned, about 3-5 minutes. Toss in the kale and cook until wilted. Turn the heat down to low and slowly add the half & half. Let it come to a simmer, stirring occasionally, for about 5 minutes or so. You’ll notice that it thickens a little. Next add the Parmesan cheese followed by the lemon juice and zest. Stir well and salt/pepper to taste. At this point you can shake some red pepper flakes in there if you like a little heat. Lastly, add your pine nuts to a pan and toast them dry until lightly browned and fragrant.

Once the pasta is ready, strain it and set a cup of pasta water off to the side. Add the pasta to the creamy mixture and coat the noodles well. Add a little pasta water until you have the smooth consistency you like. Top with toasted pine nuts and fresh chopped parsley. Enjoy!

BONUS PHOTO! My 8 month old nephew watching me cook my dinner via FaceTime. I tried to narrate my “show” for him like Julia Child, which I think he appreciated.

7

Okay, now back to pasta…..

Brown Sugar Grapefruit Cake

My sister had made the Smitten Kitchen Grapefruit yogurt cake before and said it was amazing, so when I got a big juicy grapefruit in my CSA this week I knew what I was going to make! She wasn’t kidding- it’s SO good. I love broiling my grapefruit with brown sugar on top, so in an attempt to switch up the original recipe a little, I used brown sugar instead of white. I also grated some fresh ginger into the glaze, which added some nice flavor. Overall, probably one of the best cakes I’ve had in a while. If you ever find yourself with a grapefruit in hand, make this right away.

Ingredients: (adapted from Smitten Kitchen)
1 1/2 cups all-purpose flour
2 teaspoons baking powder
1/2 teaspoon kosher salt
1 cup plus 1 tablespoon brown sugar
1/3 cup freshly squeezed grapefruit juice
1 tablespoon grated grapefruit zest
3 large eggs
1 cup plain whole milk yogurt
1/2 teaspoon vanilla extract
1/2 cup vegetable oil

Glaze:
1 cup confectioners’ sugar
2 tablespoons freshly squeezed grapefruit juice
1 teaspoon freshly grated ginger

Preheat oven to 350 degrees. In a medium bowl, sift together the flour, baking powder, and salt. In a separate bowl, whisk together the brown sugar, eggs, vanilla, yogurt, grapefruit juice and zest. Slowly add the dry mixture to the wet mixture and mix well. Next, fold in the vegetable oil a little at a time, making sure the oil gets well incorporated. Pour the batter into a 9 inch loaf pan that has been lined with parchment paper and greased. Let cook for 50 minutes, or until a toothpick inserted into the center comes out clean. In the meantime, make the glaze by simply whisking together the confectioners’ sugar, grapefruit juice, and grated ginger. Set Aside. When the cake it ready, have it cool inside the pan for about 10 minutes before transferring to a wire rack. With a baking sheet placed under the rack, drizzle the glaze over top of the cake, letting it soak in. Let cool another 10 minutes or so before digging in!

Veggie Sushi With Beet Wasabi Mayo

So it turns out making sushi at home is kind of complicated! Not sure how people roll them up so fast and make everything look so pretty- I had a good amount of sticky rice stuck to my hands, face, and clothes by the time I finished. Plus my roll looked a little wonky, but it was fun and I had a good laugh! I prefer the rice on the outside, but I’m thinking it is much easier to just roll it on the inside. Keeping my hands and knife a little wet when cutting the roll really helped with the stickiness a lot, so that’s a good trick to know. I wanted to do something interesting with the wasabi so I added roasted beets and ginger for some flavor, and of course the gorgeous color. I topped the sushi with mango as well, though for some reason it looks like cheese in the photos! I send my sister a picture and she responded with “and then I added some Kraft singles,” which made me burst out laughing. When all was said and done though, I really liked it! A healthy and fun dinner to make. It might not look like the lunch I get most days from Beyond Sushi, but I’m working on it.

Ingredients:
2 cups sticky rice (I bought pre-cooked to save time)
Seaweed (nori) sheets
3 small red beets, peeled and cubed
2 tablespoons light mayonnaise
1 tablespoon wasabi
1 inch cube fresh ginger
Small avocado, sliced thin
1 Daikon radish, cut into matchsticks
1 large carrot, cut into matchsticks
1 mango, sliced thin for topping
Soy sauce, for serving (optional)

Preheat oven to 350 degrees. Drizzle the beets with olive oil and cook for about 15-20 minutes, or until fork tender. In the meantime, cut the vegetables. When the beets are done, place into the food processor with mayo, wasabi, and ginger. Blend until smooth. Place a piece of the seaweed onto a sushi rolling mat and gently spread the sticky rice covering the seaweed. At this point you can either flip it over so the rice is facing down, and fill the center so the rice is on the outside when you roll it up (like I did) or you can add your fillings on top of the rice to have the rice on the inside. Once you add the filling, gently roll the sushi mat from the bottom up and tuck the sushi under, creating the rolls shape. Continue using the mat to push the roll until you have a complete piece. With a sharp knife, cut the individual pieced from the roll. Top each piece with mango and beet wasabi mayo. Serve with soy sauce!

Parsnip and Daikon Radish Truffle Fries

I LOVE truffle fries. They are amazing and delicious, but unfortunately not the healthiest thing to be eating mounds of. So when I had some parsnips and a huge daikon radish I thought I may as well try to make a healthier version of one of my favorite foods! I’ve heard of parsnip fries before, but not really radish fries, so I had no idea what they would taste like. To my surprise, they were pretty good! Mainly because anything covered in truffle oil and Parmesan cheese is magical. I also got some potatoes in my CSA bag this week, so I might just treat myself to truffle fries again tomorrow…you know, because I had the “healthy” version tonight so it cancels itself out. Right?

Ingredients:
1 large parsnip, peeled and cut into fries
1 large daikon radish. peeled and cut into fries
2 tablespoons fresh parsley, chopped
1/4 cup freshly grated Parmesan cheese
Salt and pepper, to taste
Truffle oil
Olive oil

Preheat oven to 400 degrees. Cut the parsnip and radish into the shape of fries. Make sure they aren’t too thin, otherwise they’ll burn. Toss in olive oil with some salt and pepper, then spread on a baking sheet lined with aluminum foil. Cook for 15-20 minutes, then flip and cook for another 10-15 minutes. You want them to be browned, but not burned. Once the fries are cooked, toss them with truffle oil, parmesan cheese, and chopped parsley.


Brown Butter Lemon Bars

What to do with a bunch of lemons? Make lemon bars! Everything you need to make these, you likely have in your kitchen already. They take a little time but are totally worth it. I’ve wanted to try making Smitten Kitchen’s lemon bars for a while, so when I got a handful of lemons in my CSA I knew exactly what I was going to make. They came out delicious! In an attempt to be fancy, I browned the butter before making the crust, which I thought gave it a nice nutty flavor. If you prefer not to brown the butter, just simply use room temp butter without cooking it at all. I think next time I might add a little shredded ginger into the batter as well and see what happens.

Ingredients: (adapted from Smitten Kitchen)

Crust:
2 sticks unsalted butter (browned in pan)
2 cups all-purpose flour
1/2 cup sugar
1/8 teaspoon salt

Lemon Filling:
4 large eggs, room temperature
2/3 cup all-purpose flour
1 2/3 cup sugar
1 tablespoon + 1 teaspoon lemon zest
2/3 cup fresh lemon juice (3-4 lemons)
Powdered sugar, for dusting

Preheat oven to 350 degrees. Line a 9×13 by 2 inch baking sheet with parchment paper and set aside. Place butter in a pan and cook until slightly browned and fragrant. Be sure not to burn the butter, once it begins to smell nutty, it’s about ready to be taken off the heat. Pour into a bowl and place in the fridge until set. Remove and let get to room temperature.

With an electric mixer and paddle attachment, cream the butter and sugar together. Combine the flour and salt in a bowl, and with the mixer on low, add the flour to the butter until just mixed. On a well floured surface, form the dough into a ball. Place inside the baking sheet and flatten with your hands, going up the sides as well. Chill the crust in the fridge for about 20 minutes, then cook in the oven for 15 minutes or until golden brown. Let cool.

Next, make the lemon filling by placing the eggs, flour, sugar, lemon, and zest in a large bowl. Whisk well and pour into the crust mold. Cook for 25 minutes, or until just set. You can tell when it has set by simply shaking the pan a little to see if the center jiggles. If not, it is ready to be removed. Let cool to room temperature, then serve with powdered sugar. Enjoy!

Grilled Romaine with Roasted Beets and Fennel

I’ve always wanted to try grilling romaine, but never got around to doing it in the summer. Luckily, my oven is equip with a broiler so I was able to get a similar result during the winter months! I didn’t get the exact char I was going for, but without a grill it’s tough to do. It was still super delicious and nice to have a warm salad with some of my favorite things on top- beets, fennel, and blue cheese dressing! And of course, if you DO have access to a grill, then you can certainly cook the romaine that way too.

Ingredients: serves 1-2
1 small head of romaine
3-4 small golden beets, peeled and cut into small wedges
1 large red beet, peeled and cut into small wedges
1 fennel bulb, tops removed and thinly sliced

Blue cheese dressing: (from Skinny Taste)
5oz Greek yogurt
1/2 cup blue cheese, crumbled
1 tbsp light mayonnaise
1 tbsp white wine vinegar
1 tbsp lemon juice
1/8 tsp garlic powder
Salt and pepper to taste

Preheat oven to 375 degrees. Place the beets and fennel on a baking sheet then drizzle with olive oil and a little salt and pepper. Cook for 20 minutes or until fork tender. In the meantime make the dressing. Mix the Greek yogurt and blue cheese in a bowl then add the mayo, vinegar, lemon juice, garlic powder, salt and pepper. When the vegetables are done cooking, turn off the oven and set the broiler on high. Place romaine on a baking sheet and brush with olive oil, followed by a sprinkle of salt and pepper. Cook under the broiler for 1-2 minutes or until it starts to wilt and the edges get a little toasted. Make sure not to burn the lettuce. I had a sweet little personal size romaine from my CSA so I only broiled one side, but if you use a large romaine lettuce from the regular supermarket, you’ll want to cut it in half the long way and broil both sides for sure. To plate, drizzle the romaine with the blue cheese dressing and top with roasted vegetables!