Chicken Marbella

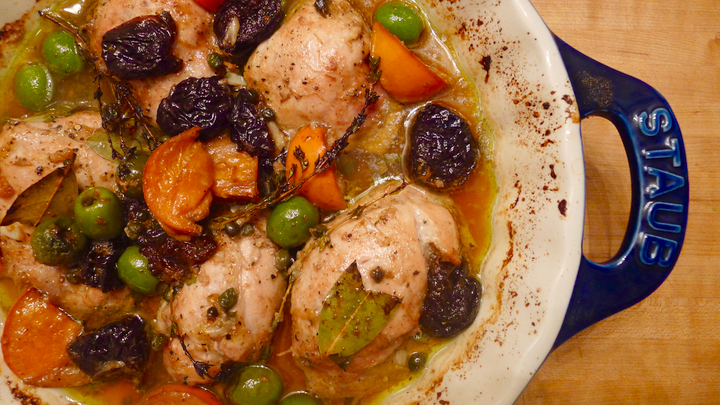
Holy Marbella… I didn’t even know Chicken Marbella existed until a few days ago, and it turns out it’s one of my favorite ways to eat chicken! The recipe is originally from The Silver Palate Cookbook from 1982. It’s cooked with capers, Spanish green olives, prunes, garlic, and fresh herbs. It’s packed with flavor and is the perfect mix of sweet and savory. It is also very easy to make! You just need to marinate it all together overnight, then plop it in the oven for about 50 mins the next day. I tweaked the originally recipe slightly by adding persimmons and fresh thyme, then omitting the white wine (because I didn’t have any on hand) and the dried oregano. I will definitely be making this recipe one million times in the future.

Ingredients: (serves 3)
1/4 cup olive oil
1/4 cup red wine vinegar
6 boneless chicken thighs
10 whole prunes, pitted
2 small persimmons, cut into wedges
About 10-12 whole Spanish olives
1/4 cup capers, and some of the juice
3 whole bay leaves
3 large garlic cloves, peeled and grated
1 tablespoon fresh thyme
Salt and pepper, to taste
1/3 cup brown sugar
1/4 cup fresh flat-leaf parsley, chopped

In a large bowl, toss together the chicken, olive oil, red wine vinegar, prunes, olives, capers and caper brine, persimmons, bay leaves, thyme, garlic, salt and pepper. Cover with plastic wrap and place in the fridge overnight, or longer is OK too, mine was marinating for a full day.

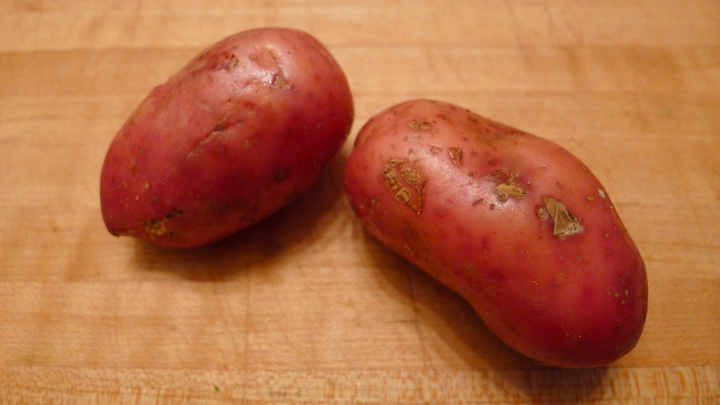
Preheat oven to 350 degrees. In a shallow baking dish, arrange the chicken in a single layer then spoon the marinade evenly over the top. Sprinkle the top of the chicken pieces with the brown sugar. Place in oven for 50 minutes (or until chicken is cooked through) basting frequently with the pan juices. Remove from oven, then with a slotted spoon transfer the chicken and the toppings to a plate, and spoon over top some of the pan juices as well. Sprinkle with fresh parsley and serve immediately. Save the rest of the pan juices and serve on the side for people to add more, if desired. If you want to have a side, rice or polenta would be a nice option. I myself made some smashed fingerling potatoes then topped them with some Parmesan cheese, fresh thyme, and a drizzle of the pan juices from the chicken.

Quick Potato & Shallot Frittata With Goat Cheese

On weekends I like to try and take a little time to make myself a nice breakfast, seeing weekdays it’s a grab and go type thing for me normally. Last weekend I threw together a mini frittata, and it was DELICIOUS and so easy to make. It all happens on the stovetop, with just a minute or so under the broiler to finish it off.

Ingredients: (serves 1)
3 eggs, beaten
Small splash of milk
2-3 small fingerling potatoes, very thinly sliced (I used my mandolin)
1 garlic clove, minced
1/4 small shallot, thinly sliced
Handful of fresh arugula
Small handful shaved Parmesan cheese
Crumbled goat cheese
Small pinch red pepper flakes
1/8 teaspoon white pepper

Add some olive oil to your skillet and sauté the garlic, shallot, potatoes, red pepper flakes, and white pepper until the potatoes are cooked through. Add the arugula and cook until wilted. Top with half the Parmesan cheese, then pour in the eggs. Top the eggs with the rest of the Parmesan cheese as well as the goat cheese. Cook over medium low heat, swirling the pan and lifting around the edges with a rubber spatula to allow the eggs to run under and disperse evenly. When the eggs are almost set, put the skillet under the broiler for 1-1/2 minutes to finish cooking the top of the eggs. Careful not to over cook though! Eggs always tend to cook a little past when you turn the heat off anyway, so I tend to cook them until a little soft then by the time they hit my plate they’ve continued cooking all the way, without overcooking them.

Save

Baked Apple Bread Custard

Another one of the family recipes that my mom shared with me while I was home last week. It is originally a recipe from my grandmother, then my mom added a few things like walnuts. It’s such a comforting dessert, and tastes amazing right out of the oven with a bit of whipped cream on top. We ended up doubling the recipe to make a larger batch, but the recipe below is for the smaller amount, which serves about 4-5 people.

Ingredients: (serves 4-5)
1 1/2 cups (day old) challah bread, crumbled
2 tablespoons butter
1 1/2 cups peeled and finely chopped apples
3/4 cup sugar
1/2 teaspoon cinnamon
1/2 teaspoon ground nutmeg
2 large eggs, beaten
3/4 cup chopped walnuts
2 1/2 cups milk

Preheat oven to 375 degrees. You can crumble the bread in a food processor or by hand. You want it to be crumbled but not too broken down that you have tiny breadcrumbs. In a large bowl mix together the bread, apples, sugar, cinnamon, nutmeg, eggs, walnuts, and milk. Pour the mixture into a buttered casserole dish (alternatively, you can use coconut oil) then place the dish on a baking sheet, and fill the baking sheet with water to create a water bath. Bake for 45 minutes or until firm. Let cool slightly, then serve warm with whipped cream!

p1130707-1

Mom’s Homemade Pear & Vanilla Bread

Nothing is more comforting than warm bread out of the oven covered in butter. Well, aside from anything covered in butter. When I was home in Rhode Island last week, my mom shared a few recipes with me, one of them was this pear and vanilla bread – which is similar to banana bread but with pears instead. It couldn’t have been out of the oven for more than 2 minutes before we decided it was worth the risk of burning our taste buds off for an immediate first taste. SO worth it.

Ingredients:
8 tablespoons unsalted butter
1/2 cup brown sugar
1/2 cup white sugar
2 large eggs
1 tablespoon vanilla extract
4 very ripe pears, peeled and diced
2 cups all-purpose flour
1 teaspoon baking power
1/2 teaspoon kosher salt
1 tablespoon cinnamon
1/2 teaspoon nutmeg

In a standing mixer, mix together the butter, brown sugar, eggs, and vanilla until smooth. In a small bowl, smash the pears (don’t need to completely smash though) then add it to the butter mixture. In another large bowl, whisk together the flour, baking powder, salt, cinnamon, and nutmeg. Add to the wet mixture and mix until well incorporated. Pour mixture into a greased loaf pan, and bake for 45-1hr or until golden and an inserted toothpick comes out dry. Let cool for a few minutes, then serve sliced with buttah!

Save

Save

Brussels Sprout Pizza With Sausage & Red Onion

I woke up early today and couldn’t fall back asleep, so I got out of bed and made some homemade pizza dough. Because that’s what normal people do, right? I made enough so I could freeze a couple of individual batches to use in the future. I had some Brussels sprouts, red onion, and Italian sausage on hand, so I decided to make a white pizza. I used a mixture of mozzarella, ricotta, and Parmesan cheese… because there’s no such thing as too much cheese. Then I topped it with an egg at the end and BAM! Successful Sunday night dinner for one.

Ingredients-

Pizza Dough:
4 cups all-purpose flour
1 packet instant dry yeast
2 teaspoons kosher salt
1 teaspoon sugar
1 1/2 cups water (110 degrees F)
2 tablespoons olive oil, plus more for bowl

Pizza Toppings:
10 Brussels sprouts, leaves peeled
1/2 red onion, thinly sliced
2 Italian sausages, casings removed
Mozzarella cheese, sliced
1 1/2 cup ricotta cheese
Parmesan cheese, for topping
Red pepper flakes, to taste
Salt and pepper, to taste
1-2 eggs

If you’re in a pinch and don’t have the time to make your own dough, Whole Foods and Trader Joe’s sell some pre-made dough that I like. You can also stop into your local pizza shop and they’ll usually sell you a ball of dough for a dollar or two!

To make your own dough, start by placing the flour, sugar, salt, and yeast into the bowl of your standing mixer. Start mixing on the lowest speed, and gradually add in the warm water and 2 tablespoons olive oil. Let mix until the dough comes together into a ball. If it is looking too sticky, you can sprinkle in more flour. Alternatively, if it is looking too dry and flaky you can add a tablespoon of water. Turn the dough out onto a floured surface and knead with your hands a little to smooth it out, then form it into a ball and place it in a large lightly oiled bowl. Cover with saran wrap and let sir for 1 hour, allowing it to double in size. For me, this dough will usually make about 4 pizzas. I kept one out to use, and individually wrapped the others in saran wrap and placed them in a freezer-safe bag in the freezer to use a different day.

Preheat oven to 500 degrees. If you’re using a pizza stone, place it in the oven now. If you’re planning to use a baking sheet, simply cover it with parchment paper. Sauté the sausage in a little olive oil until browned, then set aside. Pour out most of the oil, then cook your onions in the same pan. Also set that aside. Lastly, quickly toss the Brussels sprouts in a little olive oil.

Roll out your dough on a floured surface. For me, I have a tough time getting my pizza onto the pizza stone after i’ve added all the topping, so what I like to do is remove the stone from the oven and quickly add the dough – but be careful because that little sucker is HOT. Moving fast, add the mozzarella slices, dollops of ricotta, crumbled sausage, red onion, and a small drizzle of olive oil. Place in oven and cook for 8-10 mins, or until it’s about 75% cooked. Remove from the oven and add the Brussels sprouts, then put back in the oven for another 7-10 minutes, or until the Brussels have crisped a little, the cheese is bubbling, and the crust/bottom of the pizza is golden brown.

Remove from oven and place on a cutting board to cool for a minute. While it’s cooling cook up 1-2 sunny-side up eggs and place them on top of the pizza, then break the yolks to let them run. Top with fresh grated Parmesan cheese, black pepper, and red pepper flakes. Enjoy!

Save

Pasta with Homemade Pumpkin Sauce

I hate seeing all those pumpkins going to waste after Halloween, so this week I decided to do something about it. And what better way to protest wasting pumpkins than just eating every pumpkin in sight, right? I ended up making homemade pumpkin purée and freezing half of it (so that I can have pumpkin pie on demand all winter) then I roasted all the seeds to snack on… for what will probably be an eternity because many pumpkins were involved.

Last night I made some pasta using the purée, and it came out great. Thinking I’ll experiment with making some scones this weekend as well. My mom said when I was a baby she gave me so much pumpkin baby food that I turned orange. Hopefully that won’t happen again, but if it does, please know it’s not me showing support for Trump… I simply just ate too much pumpkin again.

Ingredients: (serves 2)
2 garlic cloves, minced
1/2 shallot, minced
2 tablespoons butter
2 cups pumpkin purée
1 cup unsalted chicken stock, plus more as needed
4-5 small chunks of Parmesan cheese
1 teaspoon nutmeg
1 teaspoon ground sage
Salt and pepper, to taste
Gemelli style pasta, or pasta of your choice

Making your own pumpkin purée is very simple. Just cut up the pumpkin into large slices and scoop out the pulp and seeds. Toss the pulp, but save the seeds to roast later! Preheat the oven to 350 degrees. Place the pumpkin slices on a parchment lined baking sheet and roast in the oven for 1 hour, or until fork tender. Peel off the skin, and purée the pumpkin in batches until smooth. You’ll have a lot, so feel free to freeze most of it for a different day!

Now, for the pasta. In a Dutch oven, sauté the garlic and onion in 1 tablespoon butter until softened. Add the pumpkin purée, Parmesan cheese, nutmeg, sage, another tablespoon butter, and half of the chicken stock. Stir well to combine. Once some of the chicken stock has been absorbed, add the rest of the stock. Cook on low for about 10 mins, stirring often. You can keep adding more chicken stock as needed. In the meantime, make your pasta per the box instructions. When the pasta is cooked, strain and toss into the pumpkin mixture. Save a splash of the pasta water to add in as well. Add one more small pad of butter for one final toss of the pasta. Plate and add a bit more grated Parmesan cheese, followed by a dollop of ricotta cheese. Enjoy!

Save

Save

Veggie Sushi with Cauliflower “Rice”

img_1646As much as I wanted to just cry tears into a bowl of carb-filled pasta the night after the election, I decided a healthy dinner might make me feel better. So, I made some vegetable sushi! I got cauliflower in my CSA this week, and decided to use that as the “rice” this time. It’s not as sticky as rice, but holds up pretty well. I filled it with a few veggies I had on hand, and used my Bragg’s liquid aminos instead of soy sauce – it tastes exactly the same but is a healthier alternative!

Ingredients:
1 small head of cauliflower, cut into chunks
1 tablespoon rice wine vinegar
2 medium carrots, but into matchsticks
1 mango, cut into matchsticks
1 cucumber, cut into matchsticks
3-4 nori sheets

Start by making the cauliflower rice by processing the cauliflower and rice vinegar until it resembles the texture of rice. Set aside. I saw a few recipes where they steam the cauliflower first before processing it and letting it cool, which might make it stickier, but I went the lazy route and skipped the steaming… worked out fine! Next, place a nori sheet on your sushi mat and spread a layer of the cauliflower reaching close to the edges, but leaving one of the short edges with about an inch free (see photo) Next, starting at the bottom, layer a row of vegetables. You don’t want to over fill it because when you wrap it up it’ll be difficult, but you also don’t want to under fill it because you want to taste the fillings!

Now, time to get your roll on. Start with the end closest to you and lift the edge of the nori over the veggies and tuck it under. Using the sushi mat, press it over the roll to help tighten it, then continue rolling with the help of the mat, pressing and tucking as you go until it’s all rolled up. Use a dab of water to help seal the roll shut at the end.

Using a clean and very sharp knife, hold the roll tightly and cut the roll into pieces. Top with pickled ginger, wasabi, soy sauce or liquid aminos… whatever your little heart desires. Enjoy!

p1130546

Pancetta Egg & Kale On A Biscuit

Holy mother of breakfast sandwich! I saw a biscuit sandwich in Saveur magazine that inspired me to make this. They used collard greens with mustard, but I went with some sauteed kale and shallot instead. I’ve always wanted to make my own biscuits, but for some reason thought it would be much more complicated than it turned out to be. Which is great because yay homemade biscuits whenever I want! But also bad because oh no… homemade biscuits whenever I want. We’ll see how this all works out in the next few months, I may need a biscuit intervention around the New Year. Anyway, this sandwich was amazing! The salty pancetta with magic, and the soft marbled eggs were fluffy and amazing. Can’t wait for next weekend!

Ingredients:

Biscuit Dough (from Saveur) – makes 4 medium biscuits
2 1/2 cups all-purpose flour
2 1/2 tablespoon sugar
1 tablespoon baking powder
1 tablespoon kosher salt
Pinch of black pepper
5 tablespoons frozen unsalted butter, plus 2 extra tablespoons (melted) for brushing
2 cups buttermilk (you can make your own super easy buttermilk HERE)
1 tablespoon honey

Toppings: (for 1 person)
4 slices pancetta
1 cup kale, roughly chopped
1/4 shallot, sliced
2 eggs
Olive oil
Salt and pepper, to taste

Start by making the biscuits. Preheat oven to 400 degrees. Whisk flour, sugar, salt, baking powder, and a pinch of black pepper in a large bowl. Using the course side of the box grater, grate the frozen butter into the bowl. Mix to incorporate. Add the buttermilk a little at a time, and gently mix together with your hands. Pour the dough out onto a floured surface and form/pat the dough into a circle that is two inches thick. Using a round cutter, cut out 4 biscuits. You may need to roll up the scraps and pat it back out in order to get your last biscuit. Place the biscuits on a parchment paper lined baking sheet, and bake for 18-20 minutes or until golden brown. Remove from the oven and brush each biscuit with the melted butter honey. Place back in the oven for 5 minutes. Remove and let cool a bit before you start slicing them in half.

While the biscuits are cooling, cook all the toppings. In a medium pan, cook up the panetta until crispy. Set aside. In the same pan, saute the shallots and kale until softened and wilted, adding a little olive oil as needed. Also set aside. Lastly, melt a small pad of butter in the pan. Crack both the eggs into the pan, then break and lightly swirl the yolk around. Pepper to taste (you can add salt too but the pancetta is pretty salty, so up to you!) Let the eggs sit and cook for about 3 minutes until there are no more runny bits, then run under the edges with a rubber spatula to loosen the egg, and fold into quarters.

Gently slice the biscuit in half. Top with the kale, egg, and pancetta. Maybe add a little hot sauce in there too if you’re feeling a little crazy! Grab some napkins and get to work…

Kale Potato & Beet Galette With Feta Cheese

I was planning on a making a pizza with some leftover pizza dough I recently froze (or so I though) but when I took it out of the freezer, I realized it was leftover dough from the last galette I made! Whoops. I ended up just making a galette instead, but it was just as delicious! I’ll have to start labeling the things in my freezer from now on though…

Ingredients:

Dough:
1 cup all-purpose flour
1/2 teaspoon salt
1 tablespoon sugar
6 tablespoons cold unsalted butter, cut into small cubes
1 large egg, beaten

Filling:
2 cups kale, roughly chopped
1/2 shallot, chopped
1 garlic clove
2-3 fingerling potatoes, thinly sliced
2 small golden beets, thinly sliced
Salt and pepper, to taste
1 cup crumbled feta cheese

Start by making the dough as it will need some time to chill in the fridge. Whisk together the flour, sugar, and salt. Cut in the butter with a pastry cutter, or use your hands. If using your hands, you simply want to roll the butter chunks between your fingers with the flour until it resembles the texture of small peas. Pour in the egg and mix until incorporated. Pour out onto a flat surface and shape into a disk, then wrap in plastic wrap and place in the fridge for at least an hour.

When the dough is almost ready preheat oven to 375 degrees.

Start cooking the other ingredients. Saute the beets and potato slices in olive oil until fork tender, set aside. Next saute the garlic and shallots in olive oil until softened, then add the chopped kale and cook until wilted, about 3-4 mins. Salt and pepper to taste.

Roll out the rough on a lightly floured surface until you have a full circle. Add 1/2 of the feta cheese on the bottom of the dough, leaving a 2-inch border. Top with half the kale and shallots, followed by the beets and potatoes, then the rest of the kale. Top with remaining feta cheese, then fold the edges of the dough over the filling, and brush the edges with the egg wash.

Place in the oven and cook for 30 mins or until the dough is golden brown. Enjoy!

p1130471

Save

Save

Tomato Kale And Goat Cheese Frittata

A typical nighty event for me is staring into my fridge (while starving) and trying to think of something delicious to make that won’t take too long. Luckily last night I had an easy solve – frittata! The great thing is you don’t need a crust for this, you can just sauté everything right in the pan, add the eggs and cheese, then pop it into the oven for about 10 minutes. It’s eggy magic.

Side note, I moved into a new apartment and the lighting is terrible for photos! So bear with me while I figure that out over the next few weeks…

Ingredients:
2oz salami, chopped
1 cup kale, chopped
1/2 small white onion, chopped
1 large garlic clove, minced
6 eggs
1/4 cup Greek yogurt
1 cup chopped tomatoes
3 tablespoons herbed goat cheese
Salt and pepper, to taste
Olive oil

Preheat oven to 350 degrees. In an oven proof skillet, sauté the garlic, onions, and salami in a little olive oil until the veggies are softened and the salami starts to crisp, about 3 minutes. Add the kale and cook for another 3 minutes. Salt and pepper to taste. In the meantime, whisk together the eggs and Greek yogurt in a bowl. You can also use milk, but I like the fluffiness that the yogurt gives the eggs. Pour the eggs into the skillet and give it a quick mix to stir together the ingredients. Top with the tomatoes and goat cheese, and let cook for about 3-4 minutes on the stovetop. Transfer to the oven and let cook for 10 minutes, or until the eggs are set and don’t wiggle when you give the pan a shake. The eggs will continue to cook for a few after you remove the pan from the oven, so do not overcook them in the oven or you’ll be eating some tough eggs!

Save

Save